How to Use a Meat Thermometer (Where to Put It, and When)
A thermometer only helps if the tip is in the right place at the right time. Here is where to put it in every cut, when to check, how to test it is accurate, and which kind to buy.
Quick answer
Push the probe into the thickest part of the meat, away from bone, fat and gristle. For thin foods like burgers, chops and thin chicken breasts, the USDA says to insert it through the side until the tip reaches the center. Check near the end of the cooking time, and cook to the USDA safe minimum: 145°F for steaks, chops and roasts with a 3-minute rest, 160°F for ground meat and 165°F for all poultry.
A thermometer is the single most useful tool a griller can own, because it replaces guessing with a number. The USDA is blunt about why guessing fails: color is not a reliable sign of doneness, and a hamburger cooked to 160°F, as measured with a food thermometer, is safe regardless of its color. But a thermometer only gives the right number if the tip is in the right place.
The one rule: the center of the thickest part
The USDA’s instruction is to place the thermometer in the thickest part of the food, away from bone, fat or gristle. Bone, fat and gristle heat differently from the muscle around them, so a reading taken against them misleads. The thickest part is the last place to cook through, so that is the reading that matters.
Which kind of thermometer, and what to look for
The USDA compares several types, and the differences that matter at the grill are speed and whether it stays in the meat.
| Type (USDA’s names) | Reading time the USDA gives | Best for |
|---|---|---|
| Thermocouple (digital) | 2-5 seconds | Fast spot checks at the grill |
| Thermistor (digital) | About 10 seconds | Everyday spot checks |
| Instant-read dial (bimetal) | 15-20 seconds | Occasional use; slower to read |
| Oven-safe dial (bimetal) | 1-2 minutes | Roasts; the USDA notes it is not appropriate for thin foods |
| Wireless / smart probe | Stays in the food | Long cooks and roasts, monitored from a phone |
| Thermometer fork | 2-10 seconds | The USDA notes it cannot be calibrated |
For most grilling, a fast digital instant-read. Steaks, burgers, chops and chicken cook in minutes, and a reading in a few seconds means the lid is open for a few seconds. Look for a thin probe, a fold-away design, and waterproofing so it can be rinsed.
For smoking and roasts, a leave-in probe as well. On a long cook a probe that stays in the meat — wired to a base or fully wireless — tells you the temperature without opening the lid at all. The USDA’s smoking guidance is that an oven-safe thermometer can stay in the meat during smoking, with an instant-read used once the meat comes out.
Skip the pop-up timer as your only check. The USDA says checking with a conventional food thermometer is always recommended.
Thermometers that fit the job
Two fast instant-reads for everyday grilling and two leave-in options for long cooks, all from our thermometer shortlists. Prices are fetched live.
How this is funded: we earn a commission if you buy through our links, at no extra cost to you. It never changes which gift we recommend, and we’ll tell you when we’d skip one. Full disclosure.
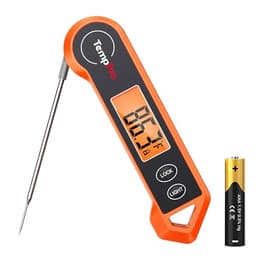
ThermoPro TP19H Waterproof Instant-Read Thermometer
A waterproof digital instant-read that reads in about three seconds and folds away. The one to buy first.
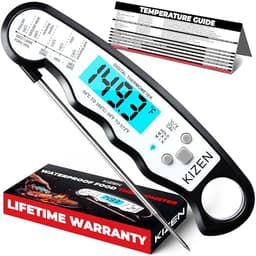
KIZEN IP67 Instant-Read Meat Thermometer
An IP67 waterproof instant-read with a big backlit screen and a magnetic back that sticks to the grill hood, for even less money.
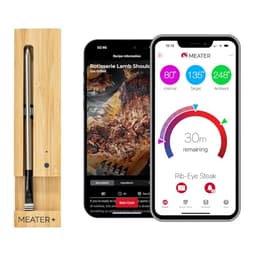
MEATER Plus Wireless Smart Meat Thermometer
A fully wireless leave-in probe that reports to a phone, for roasts and smoking. Nothing trails out of the lid.
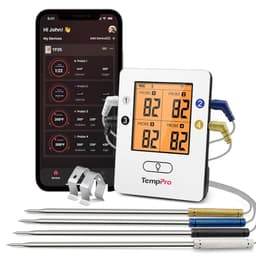
ThermoPro TP25 4-Probe Bluetooth Thermometer
Four wired probes on one base: several cuts at once, or one probe left at grate level to read the air on a smoke.
$49.99 · View on AmazonPrice as of September 17, 2026. #ad How we’re funded
Where to put it, cut by cut
| Food | Where the tip goes | USDA safe minimum |
|---|---|---|
| Steaks, chops, roasts (beef, pork, veal, lamb) | Center of the thickest part, away from bone; thin chops from the side | 145°F, then rest at least 3 minutes |
| Burgers and sausages | In through the side, to the center | 160°F (ground meat) |
| Chicken breasts | Thickest part; thin breasts from the side | 165°F |
| Whole chicken or turkey | Three places: innermost thigh, innermost wing and thickest part of the breast, avoiding bone | 165°F |
| Large roasts | Several places | 145°F for beef, pork, veal and lamb roasts, plus a 3-minute rest |
| Fish | Thickest part of the fillet | 145°F |
The full list of safe temperatures is on our grilling temperature chart, and the cut-specific guides — steak, burgers and chicken breast — put the thermometer to work.
How to take a reading, step by step
- Check near the end. The USDA says to use the thermometer near the end of the estimated cooking time, checking before the food is expected to be done.
- Go in from the right direction. Top-down into the thickest part of a thick cut; through the side for anything thin.
- Wait for the number to settle. A digital instant-read settles in seconds; a dial takes much longer.
- Compare it with the safe minimum. If it is short, give it a few more minutes and check again in the same spot.
- Rest where required. Steaks, chops and roasts of beef, pork, veal and lamb get at least 3 minutes of rest at 145°F, per the USDA.
- Clean it. The USDA says to wash thermometers with hot, soapy water or according to the manufacturer’s instructions, and notes most should not be immersed in water — which is why a waterproof one is worth having.
How to check a thermometer is accurate
The USDA’s ice-water test is the easy one: immerse the stem at least 2 inches in a glass of ice water, wait at least 30 seconds, and it should read 32°F. The boiling-water test should read 212°F at sea level, though the USDA notes boiling water’s temperature varies at high altitude. If a thermometer reads off and cannot be adjusted, replace it — a thermometer you cannot trust is worse than none, because you will believe it.
The mistakes that give a wrong number
Touching bone. It gives a misleading reading. Going too deep or too shallow. Either misses the center. Checking once, in one place, on a big cut. The USDA says to check large roasts in several places and whole poultry in three. Trusting color. The USDA’s point exactly.
Not sure between a fast instant-read and a wireless probe? Our instant-read vs wireless comparison settles it, and if a MEATER is on the list, MEATER Plus vs Pro explains the difference between the models.
Frequently asked questions
Where do you put a meat thermometer?
In the thickest part of the meat, away from bone, fat and gristle, according to the USDA. For thin foods such as burgers, sausages, pork chops and thin chicken breasts, insert it through the side until the tip reaches the center.
Where do you put a thermometer in a whole chicken or turkey?
The USDA says to check three places: the innermost part of the thigh, the innermost part of the wing and the thickest part of the breast, avoiding the bone. All three should reach 165°F.
Can you leave a meat thermometer in while grilling?
Only a leave-in type — an oven-safe probe, a wired probe on a base, or a wireless smart probe designed to stay in the food. A digital instant-read is for spot checks and should come out after each reading.
How do I know if my meat thermometer is accurate?
Use the USDA's ice-water test: immerse the stem at least 2 inches in a glass of ice water, wait at least 30 seconds, and it should read 32°F. In boiling water it should read 212°F at sea level.
When should you check the temperature?
Near the end of the estimated cooking time, before the food is expected to be done — that way you catch it at the right temperature instead of after it has overcooked.
What temperature should meat be cooked to?
The USDA safe minimums are 145°F for beef, pork, veal and lamb steaks, chops and roasts, followed by at least a 3-minute rest; 160°F for ground meats; 165°F for all poultry; and 145°F for fish.
Sources
- USDA FSIS — Food Thermometers — Where to place the probe, when to check, how to calibrate in ice water or boiling water, and the thermometer types compared (accessed September 18, 2026)
- USDA FSIS — Safe Minimum Internal Temperature Chart — The USDA's official safe minimum internal cooking temperatures for beef, poultry, pork and more (accessed July 21, 2026)
- USDA FSIS — Doneness Versus Safety — USDA on why color is not a reliable doneness test and a thermometer is (accessed July 21, 2026)
Keep reading
Grilling Temperature Chart
Every USDA safe minimum in one printable chart.
See the chartBest Meat Thermometers
Instant-reads, multi-probes and smart probes, compared.
See the thermometersInstant-Read vs Wireless Thermometer
A pocket probe against a smart one at five times the price.
Read the comparisonMEATER Plus vs MEATER Pro
Which MEATER to buy, on MEATER's own specs.
Read the comparisonBest Wireless Meat Thermometers
Leave-in probes for long cooks and roasts.
See the thermometersBeginner Grilling Tips
Tip three is this guide. Here are the other nine.
Read the tips